
Recording guides
How to Record Meeting Audio in Chrome Without a Bot
Record the meeting tab and your microphone in Chrome, check both sides of the call, and choose when to send the audio for notes.
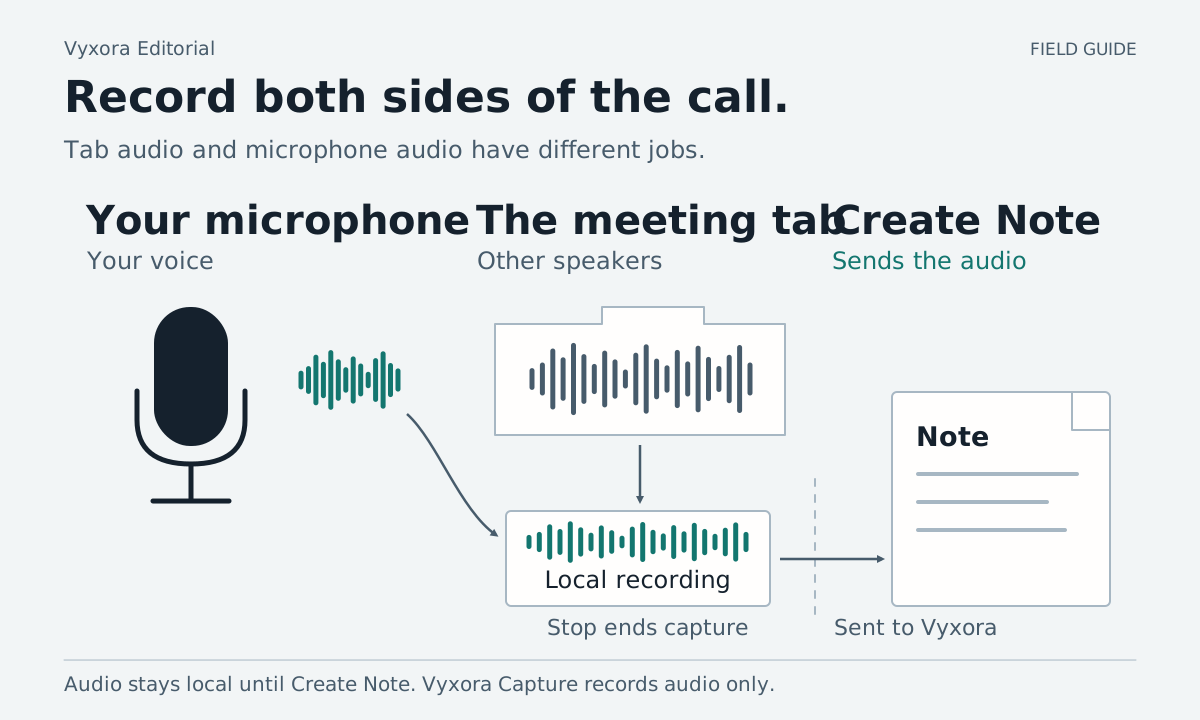
To record both sides of a browser meeting, capture the sound from the meeting tab and enable your microphone. Tab audio captures what the browser plays; the microphone captures your voice. Selecting only one can leave the other side out.
The steps below use Vyxora Capture in Chrome. Vyxora publishes this guide about its own extension. We checked these instructions against the capture documentation and current extension code on October 4, 2026; we did not test them in a live meeting for this guide.
Set up a short test before the meeting
Install Vyxora Capture, sign in, and pin it to the Chrome toolbar so you can reach Pause and Stop. Use Chrome 127 or newer. Brave is also a supported browser, but its permission prompts can differ.
Arrange recording permission with the people involved and follow your organization's recording rules. A bot-free recorder still captures the conversation. If recording is not permitted, keep written notes instead.
Before using a real call, try a brief practice recording with a colleague who has agreed to it. Wear the headphones you plan to use and speak into the same microphone. Ask the colleague to say a different phrase so you can later tell whether both voices were captured.
For example, a fictional test might use “The review is on Tuesday” from the other person and “I will send the draft on Monday” from you. These are test phrases, not a customer recording or a generated Vyxora result.
Choose Tab and enable your microphone
Open the meeting in its browser tab, then click Vyxora in the toolbar. Choose Tab as the audio source and enable the microphone if you want your own speech in the recording.
| Source | Use it for | Check before recording |
|---|---|---|
| Mic | An in-person discussion or your own voice | The selected microphone hears the intended speaker |
| Tab, with microphone enabled | A meeting running in Chrome | The meeting is in the selected tab and both sides are audible |
| Computer, with microphone if needed | Sound from another app | The browser and operating system offer the audio source you need |
The rest of this walkthrough uses Tab with the microphone enabled. Choosing Computer opens a different sharing flow; available audio sources depend on the browser and operating system. Vyxora keeps audio only, even when the browser requires a screen-sharing prompt. It does not save screen video.
Click Record. If a tab-sharing chooser appears, select the meeting tab and enable Share tab audio. A shared window or screen is not a substitute for the requested tab-audio selection.
When Chrome asks for microphone access, allow a duration that will cover the recording. Vyxora's microphone permission page closes after setup while recording continues in the background. Avoid a permission choice that ends when that setup page closes; if offered, 24 hours or 1 week covers this behavior. You can manage microphone permission later in the browser.
Check the recording before relying on it
The popup shows a timer and audio activity while recording. Keep the meeting tab open. You can close the popup and reopen it from the toolbar for Pause, Resume, or Stop.
For the practice call, speak the two agreed phrases, then press Stop. Choose Meeting and press Create Note if you want to process the test. Open the completed Note and check its transcript for both phrases. If you chose to retain the audio, use playback to check anything the transcript missed.
A moving audio meter confirms activity, but it does not prove that every speaker is present or every word is clear. Check the test result before using the setup for a longer conversation.
Vyxora Capture has a 90-minute recording limit and also enforces an audio-size limit. Leave room to stop a long meeting before either limit is reached. Processing usage depends on your plan; check your account's current allowance before sending recordings.
Stop, then decide whether to create a Note
Stop ends the recording and opens mode selection. It does not send the audio. The recording stays local until you choose a mode and press Create Note. Vyxora's recording page describes this upload boundary and its audio-only capture behavior.
Choose Meeting for decisions and follow-ups, Study for a lecture, or General for mixed material. Press Create Note when you are ready to send the recording for processing. You can close the popup while the Note processes and open the result when it is ready.
If you do not want to send the stopped recording, use Discard. If you close the popup without creating a Note or discarding it, the stopped recording remains available when you reopen it.
Fix missing voices or silent audio
| What you notice | What to check |
|---|---|
| Other people appear in the transcript, but you do not | Enable the microphone and check its permission and selected device |
| Only your voice appears | Select the meeting tab and confirm Share tab audio if Chrome shows a chooser |
| The test is silent | Confirm the selected source is playing sound; do not capture a Chrome settings page |
| A desktop meeting app is outside the tab | Use Computer only if your system offers the required audio source, then run the same short test |
| Microphone access ends during capture | Follow the permission-restoration prompt and check the finished recording for a gap |
Browser-owned pages such as Chrome settings and the extensions page are not meeting tabs. Chrome also requires a user action before an extension can start direct tab capture; its tab-capture documentation describes that restriction.
After the real meeting, check names, dates, decisions, and assigned work against the discussion before sharing the Note. Transcription can miss words or misidentify speakers, even when the audio was captured correctly.